闲谈
拿出你的气质,打开你的电脑,借你半小时搭建好属于你的hexo博客,小生用dockerfile自动帮你搭建好;
你只需要在你的mac或linux或windows上提前把docker安装好,如何安装不是我的重点,请参考Docker安装;
作为程序员,博客就像你的影子,我都已经忘了内心曾经多少次告诫自己,一定要搭建一个属于自己的技术博客,奈何日复一日过去了,近来终于落实到行动上来,所谓明日复明日,明日何其多,早晚要做的事,劝君晚做不如早做。
搭建Hexo
获取基础镜像
Docker安装成功之后方能进行接下来的操作,如果对Docker基本命令不熟悉又想真懂的可以看下我的另一篇文章Docker最简教程。首先从我的Docker Hub仓库上获取基础镜像:
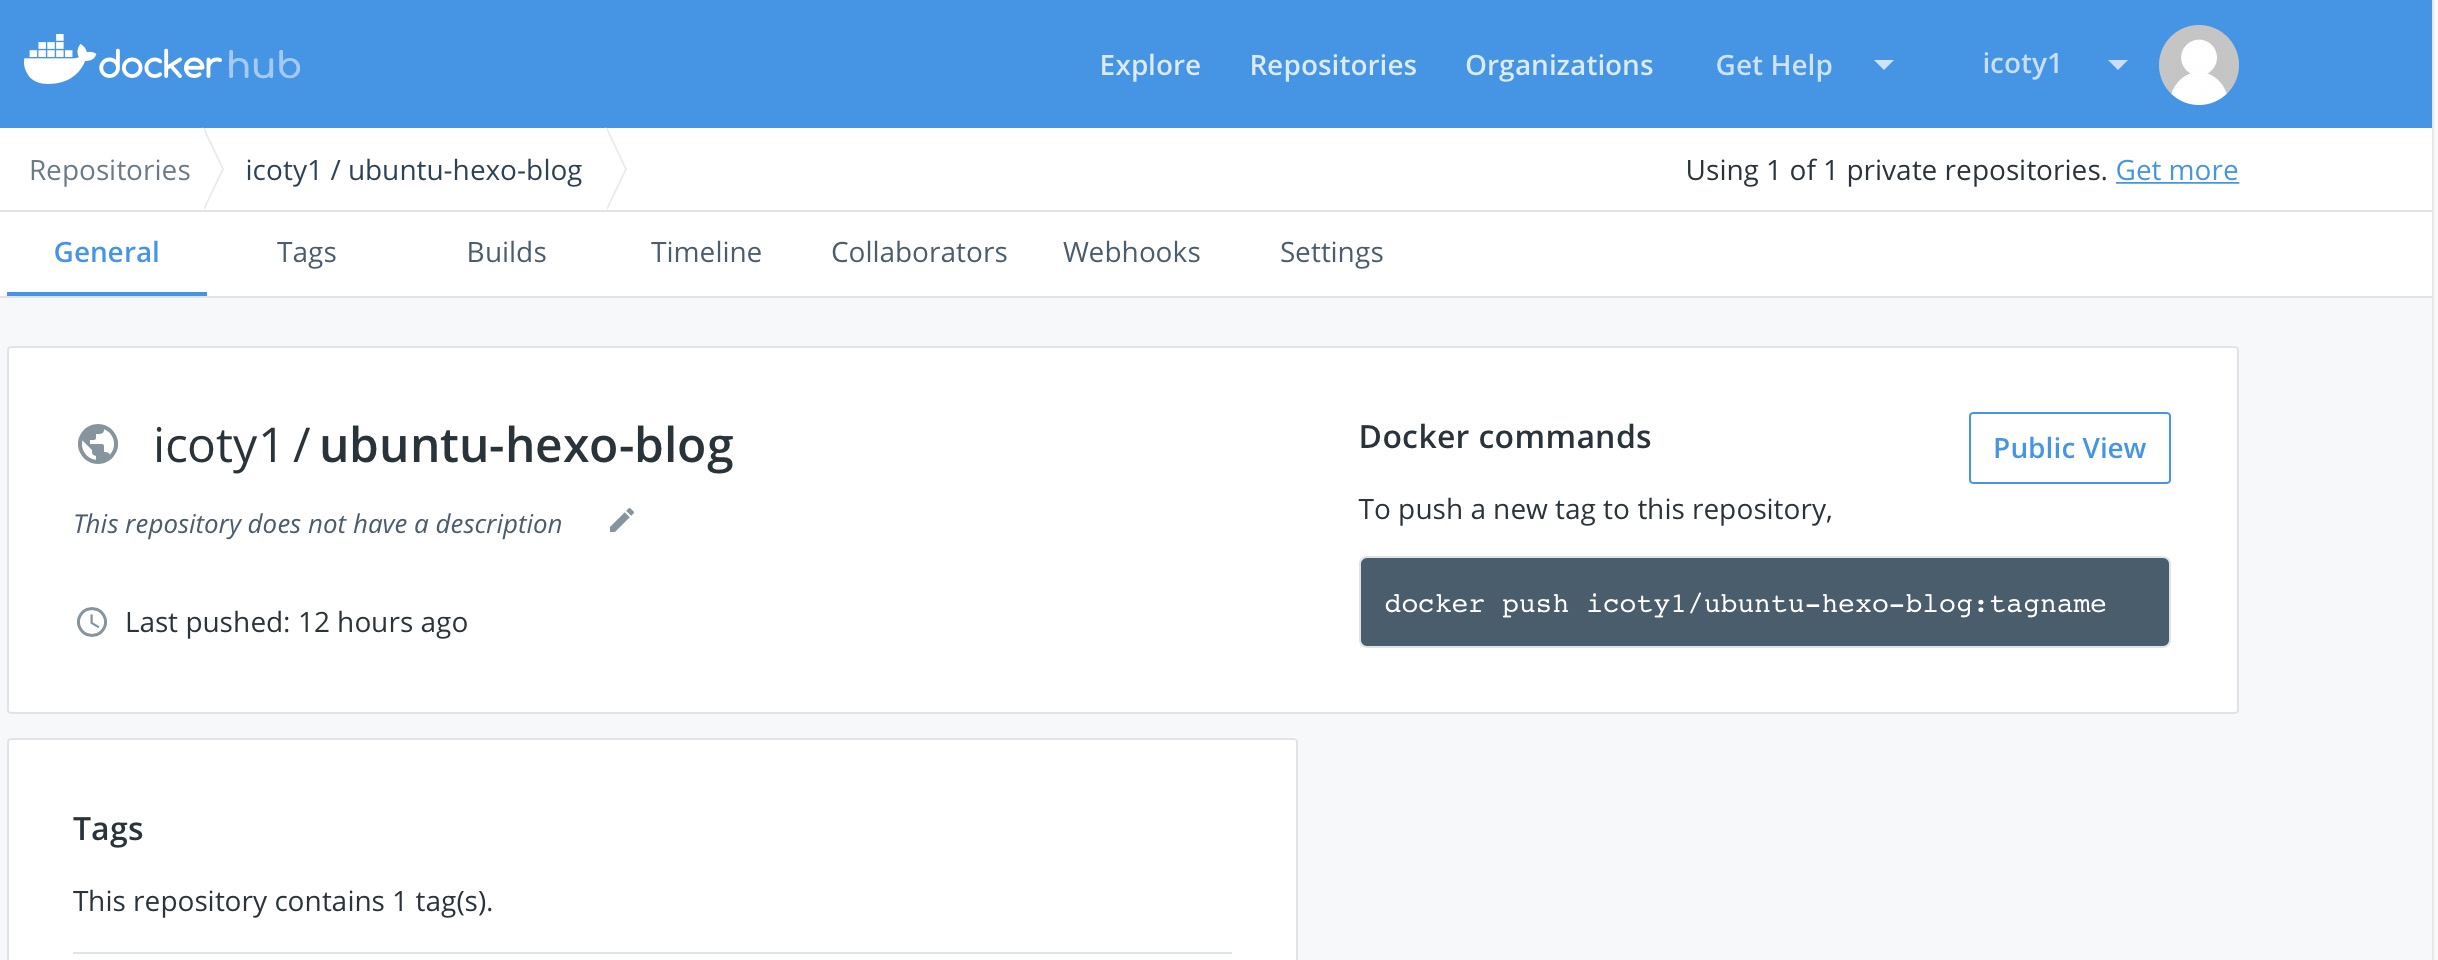
1 | $ docker pull icoty1/ubuntu-hexo-blog # 从Docker hub上的icoty1用户下获取基础镜像 |
生成Dockerfile
进入一个空的目录下新建空文件Dockerfile,复制如下内容:
1 | # 基础镜像 |
更换主题
Dockerfile中的最后两行内容表示的含义是从github上把hexo-theme-yilia克隆下来并重命名成yilia,然后放到容器的/blog/themes/目录下,其中hexo-theme-yilia是hexo的主题,hexo有很多种主题,用每一种主题搭建出来的hexo博客界面美观和布局都不尽相同,你可以通过hexo官网上浏览每一种主题长啥样子,通过github获取主题的源码仓库,选择一个你喜欢的主题,并相应的修改这两行。假如你从github选择的主题仓库地址是https://github.com/yscoder/hexo-theme-indigo.git , 那么你需要按照如下方式进行修改,如果你就想用yilia,那么你不需要做任何修改,我用的主题是https://github.com/theme-next/hexo-theme-next.git
1 | && git clone https://github.com/yscoder/hexo-theme-indigo.git themes/indigo \ |
构建Hexo镜像
在Dockerfile的同级目录执行:
1 | $ docker build -t icoty1/ubuntu-hexo . # 把icoty1/ubuntu-hexo替换成你取的名字 |
启动容器
1 | /* 把[IMAGE ID]替换成上一步构建出来的镜像的ID,该句执行成功会多出来一个容器并有一个[CONTAINER ID] |
浏览器测试
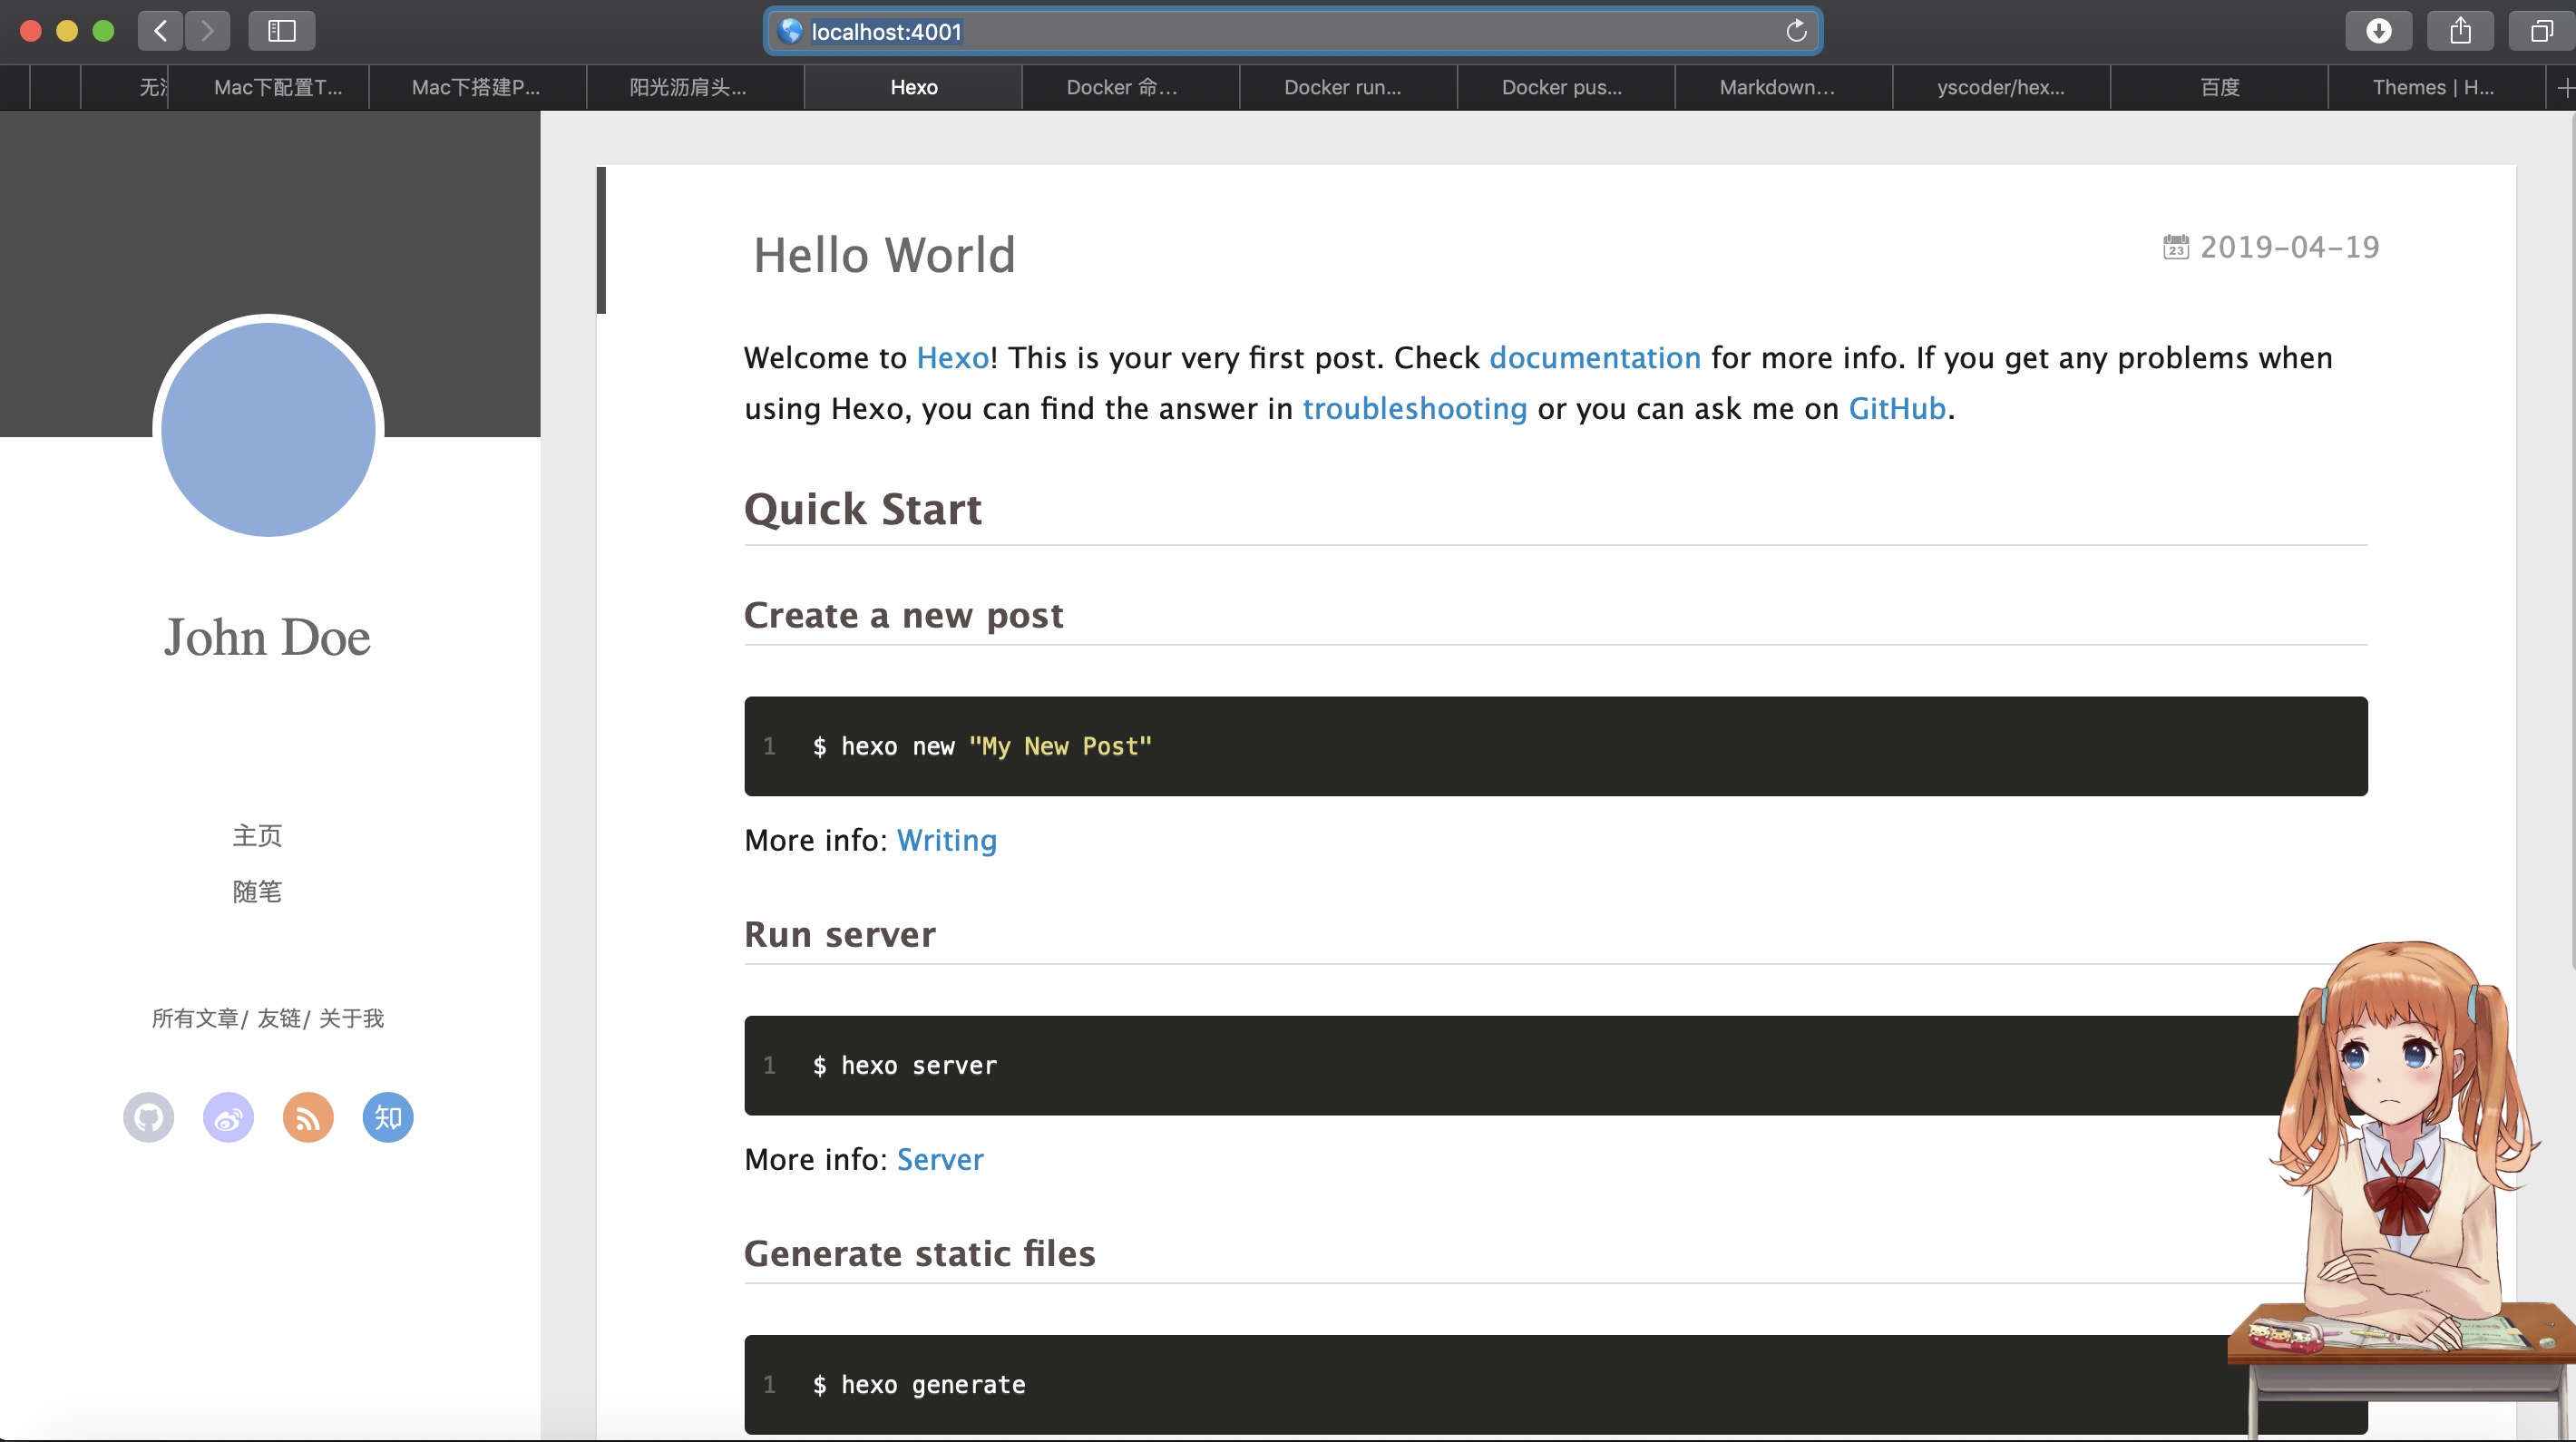
浏览器访问http://localhost:4000 ,出现下图说明已经成功,以后你的博客配置,文章撰写和发布等,都在/home/yangyu/blog/目录下进行,这和在容器内部/blog/目录下操作完全对等。
Hexo部署到Github
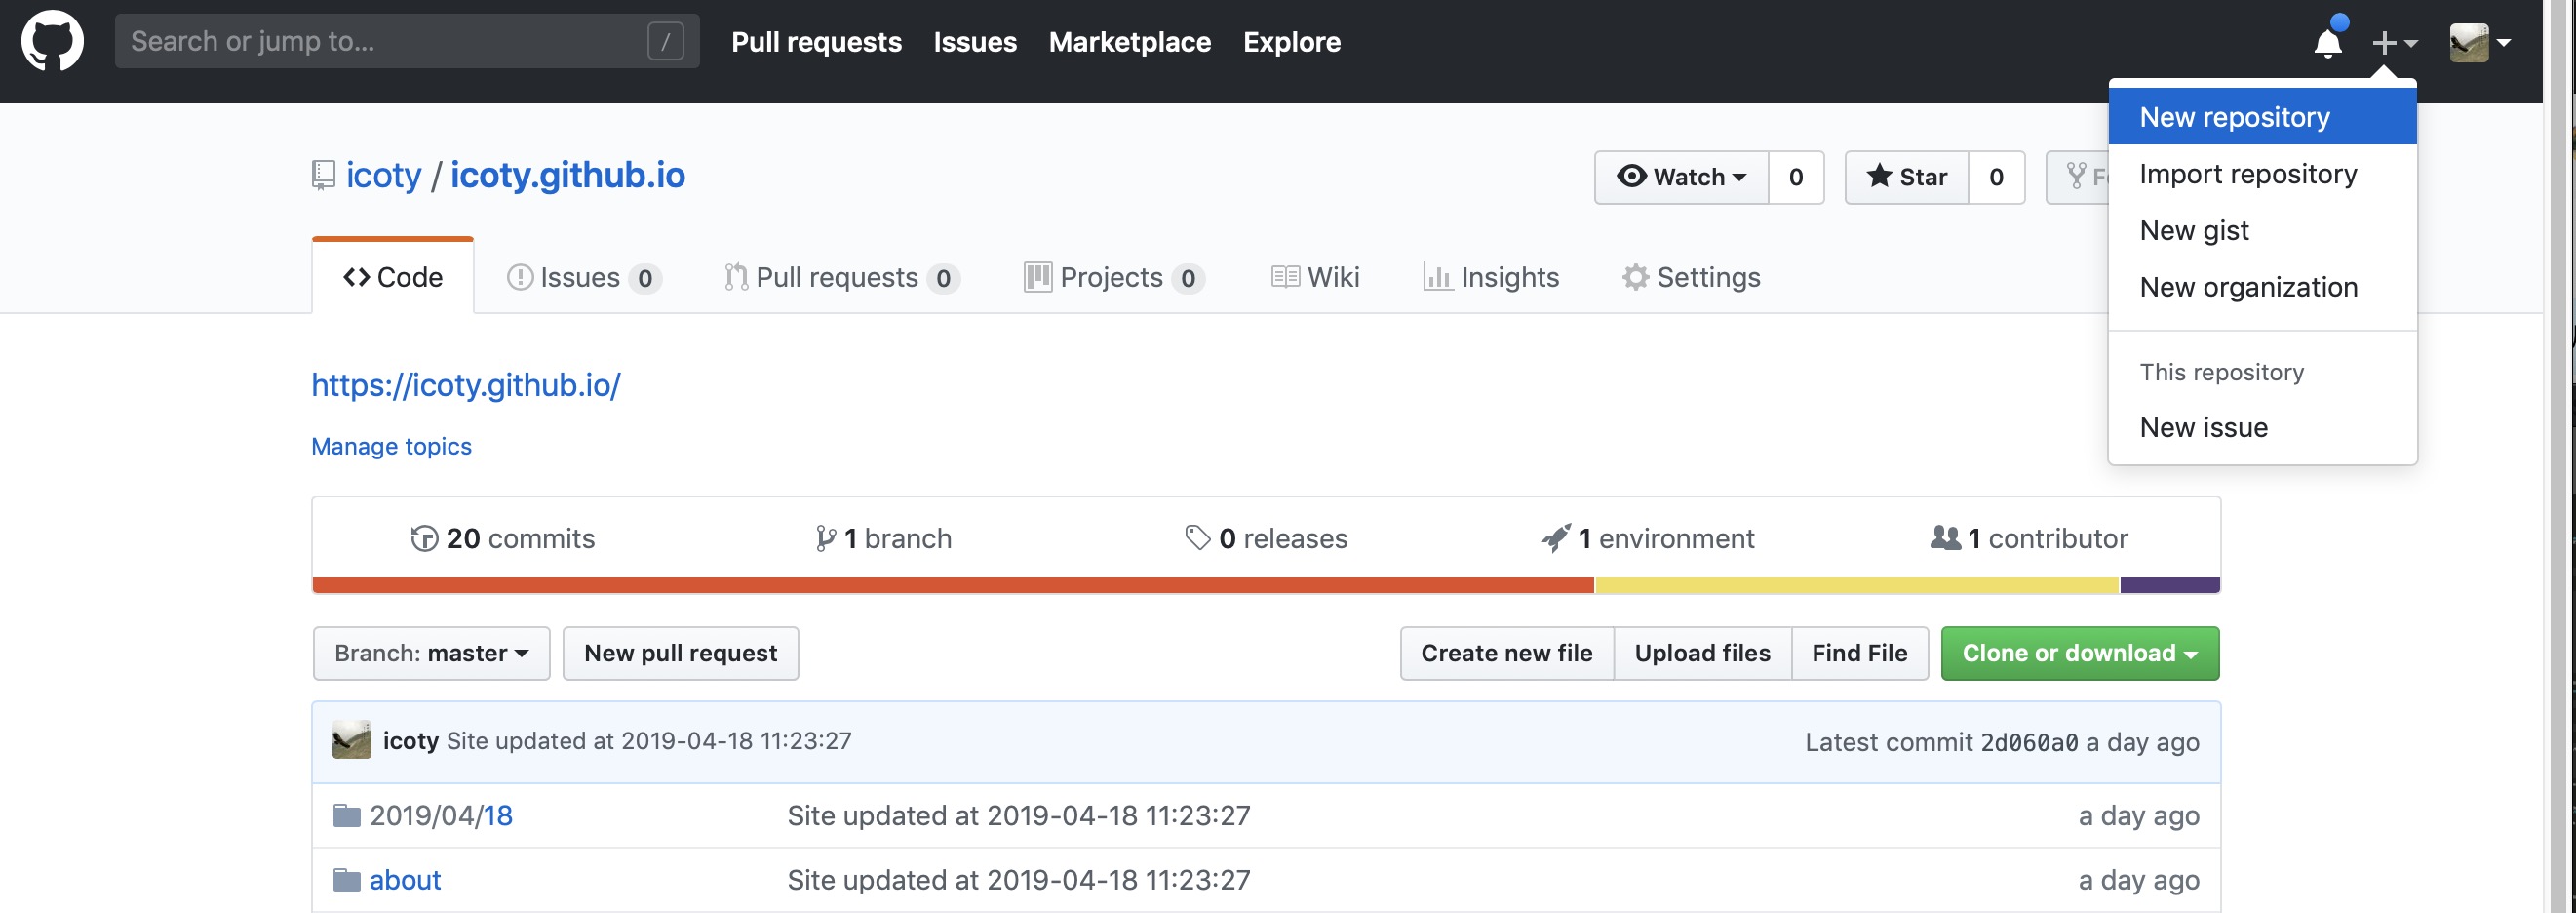
注册Github账户,如果已经注册,跳过此步;
在github上仓库“用户名.github.io”,比如我的用户名为icoty,仓库名则为:icoty.github.io;
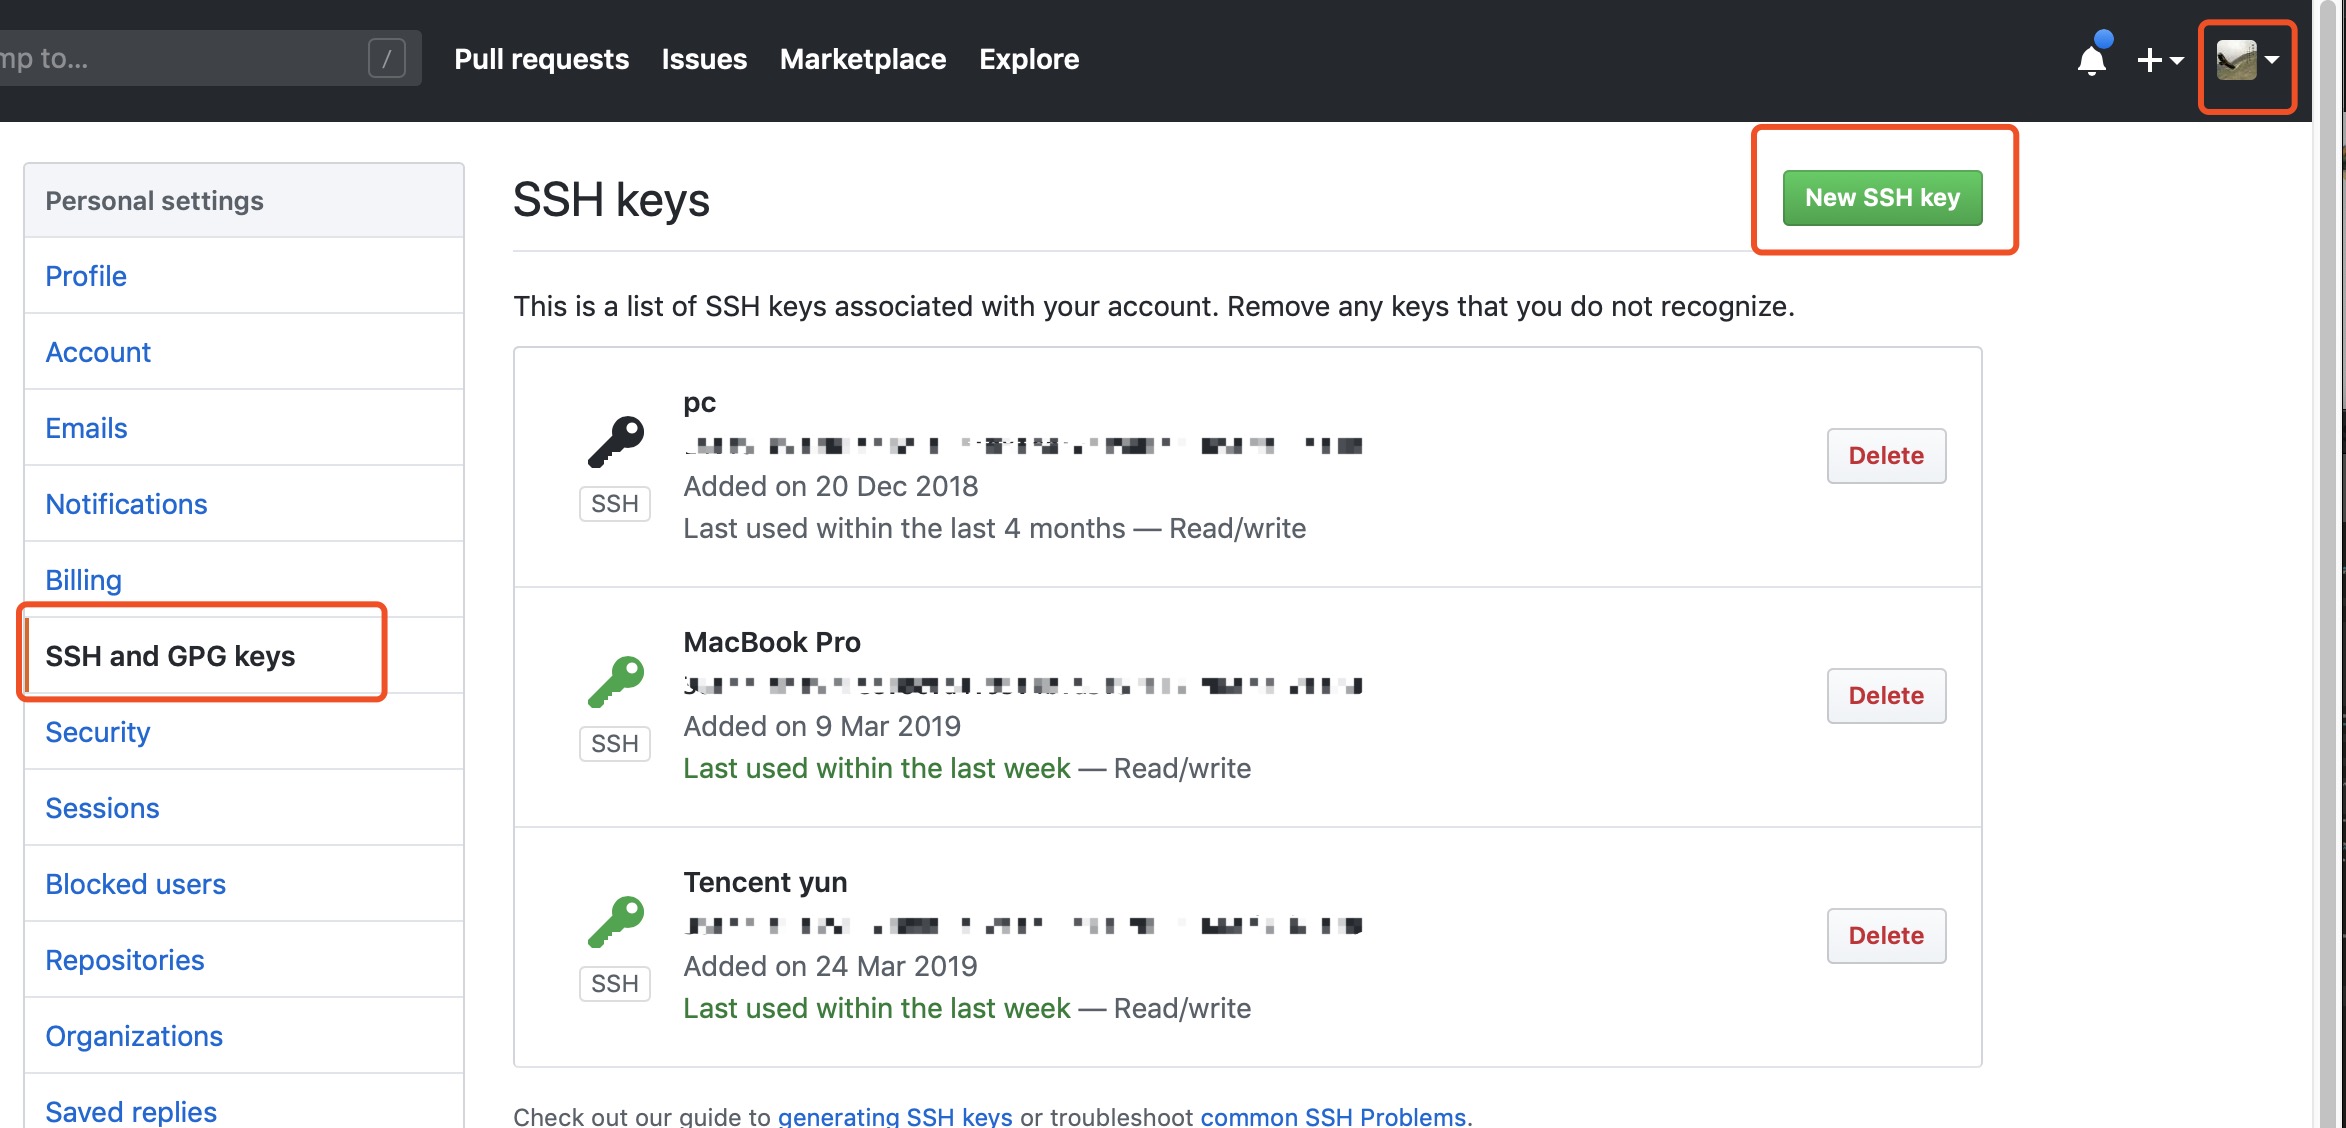
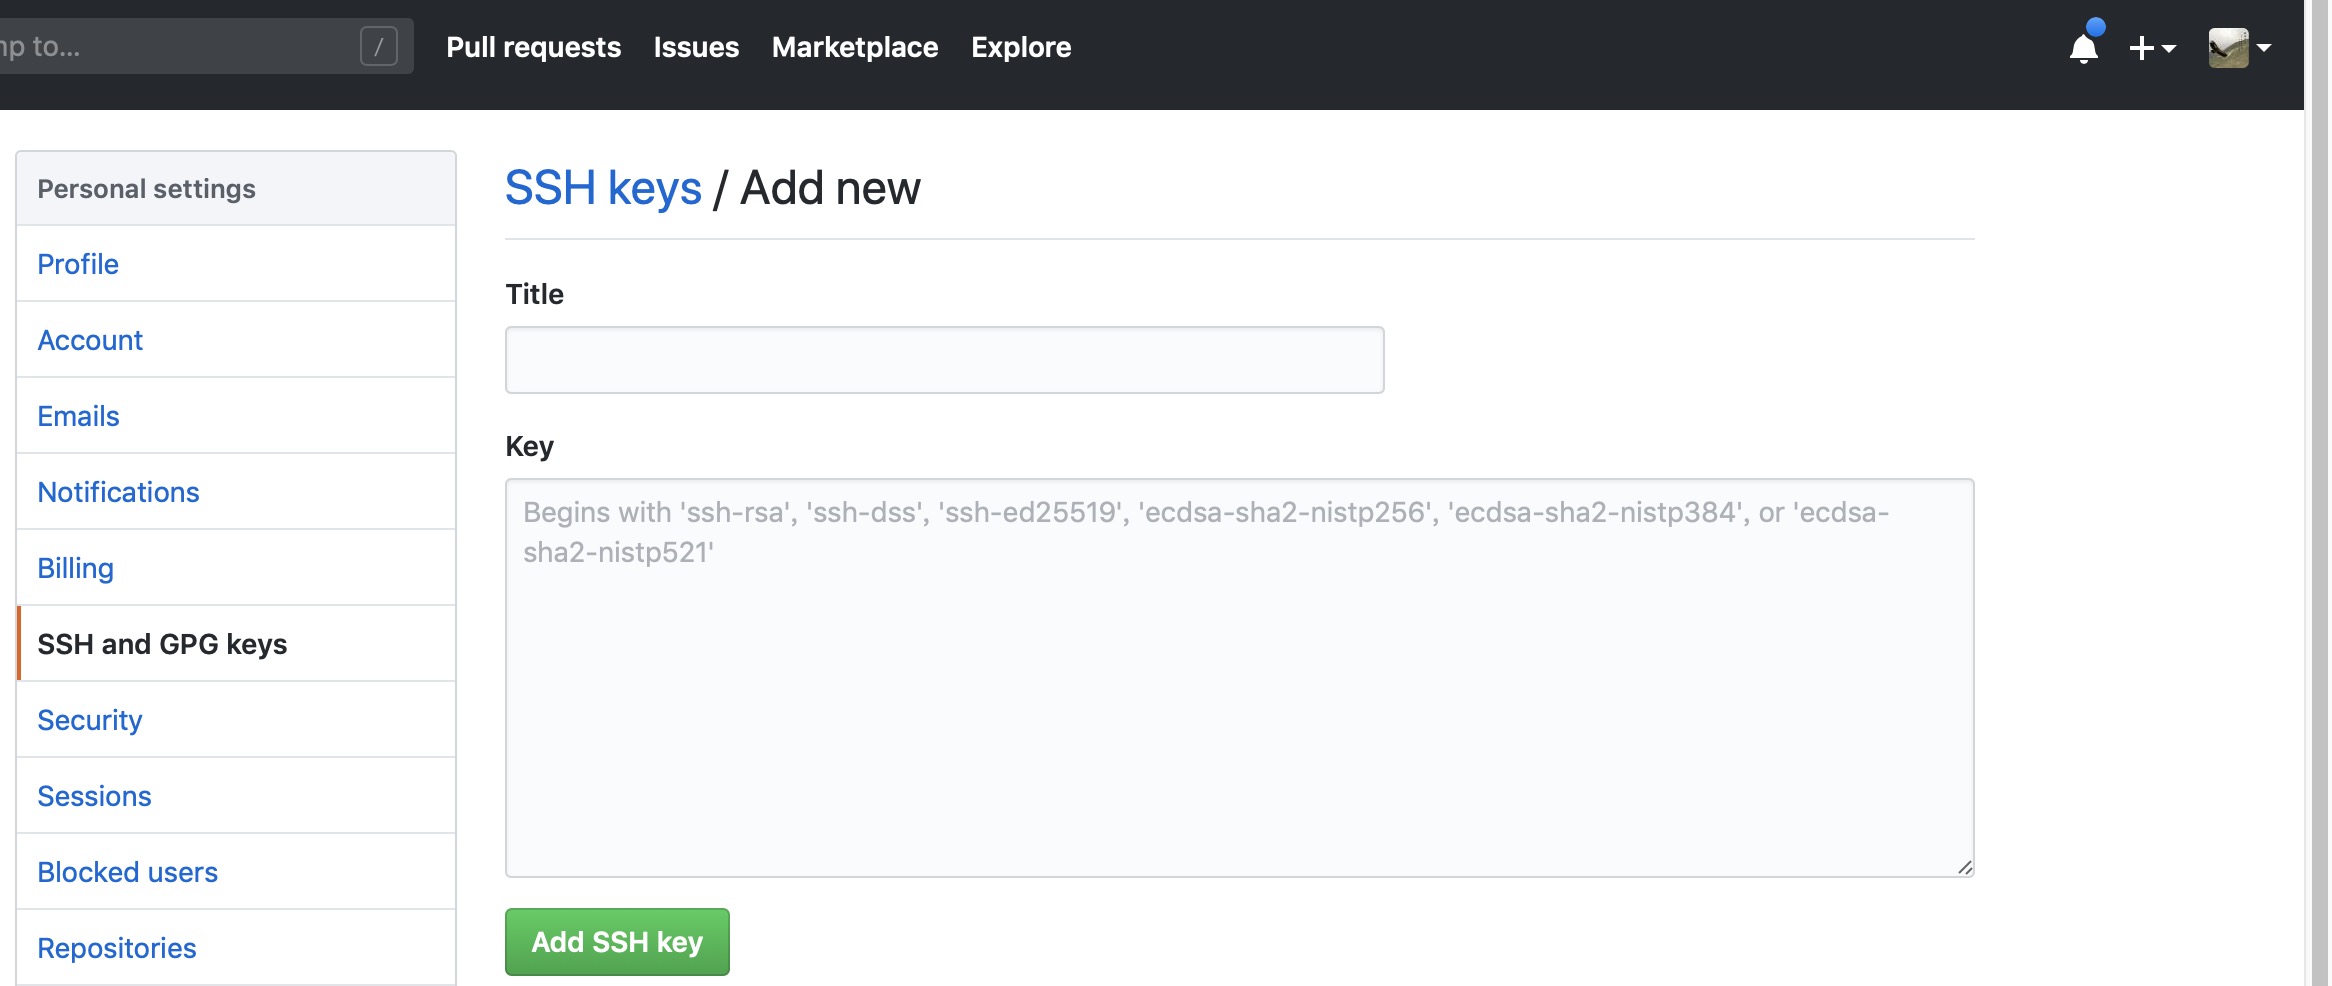
执行如下命令生成ssh key,执行完后复制~/.sshid_rsa.pub文件内的全部内容,按照图示添加ssh keys,并粘贴保存到Key栏中,Title栏随便取。
1 | $ cd ~/.ssh |
配置Hexo主题
编辑/blog/_config.yml文件,编辑标题、描述信息、Github信息,下图参见我的:
1 | # Site |
执行如下命令发布到github上,通过“https://你的github用户名.github.io”访问,我的是https://icoty.github.io
1 | $hexo generate |
编辑/blog/themes/yilia/_config.yml文件,自定义其他配置,如友链、评论、分享、头像等,这些配置并不是一定要做,做不做都行,只是配置的完善些,你的Hexo博客界面看起来美观些,如何配置在此不一一赘述,请自行查看对应主题的官方文档和Github说明。如果你能操作这里,说明我这个教程还是有效的,感谢你的坚持!
Hexo命令
Hexo搭建好后,你可以写博客发布到GitHub 上,别人通过“https://你的github用户名.github.io”就能访问你的博客和看到你写的文章,而这个章节就是教你怎么在本地写你的博客,写博客用的MarkDown语法,推荐你安装MarkDown编辑器Typora。下面列出写博客过程中常用的命令,这些命令都需要走到/blog/目录下执行。
1 | $hexo new "my-hexo" #新建my-hexo文章,在/blog/source/_post/目录下生成my-hexo.md,在这个文件里面写你的文章 |
MarkDown语法
这个比较基础,网上教程也一大堆,MarkDown很容易学,放心比九九表容易多了,只要你用markdown实际动手写过一篇博文后就上手了,因此没啥可说的。
Next主题配置
接下来的内容是针对next主题的配置,因为我选择的是next,不同主题可能有差异,特此说明。
修改文章内链接文本样式
打开themes/next/source/css/_common/components/post/post.styl文件,在文件最后且在@import之前添加如下代码:1
2
3
4
5
6
7
8
9
10
11// 文章内链接文本样式
.post-body p a{
color: #0593d3; //原始链接颜色
border-bottom: none;
border-bottom: 1px solid #0593d3; //底部分割线颜色
&:hover {
color: #fc6423; //鼠标经过颜色
border-bottom: none;
border-bottom: 1px solid #fc6423; //底部分割线颜色
}
}
文章末尾添加“文章结束”标记
在themes/next/layout/_macro/目录下新建passage-end-tag.swig,填入如下内容:1
2
3
4
5<div>
{% if not is_index %}
<div style="text-align:center;color: #ccc;font-size:14px;">-------------本文结束<i class="fa fa-paw"></i>感谢您的阅读-------------</div>
{% endif %}
</div>
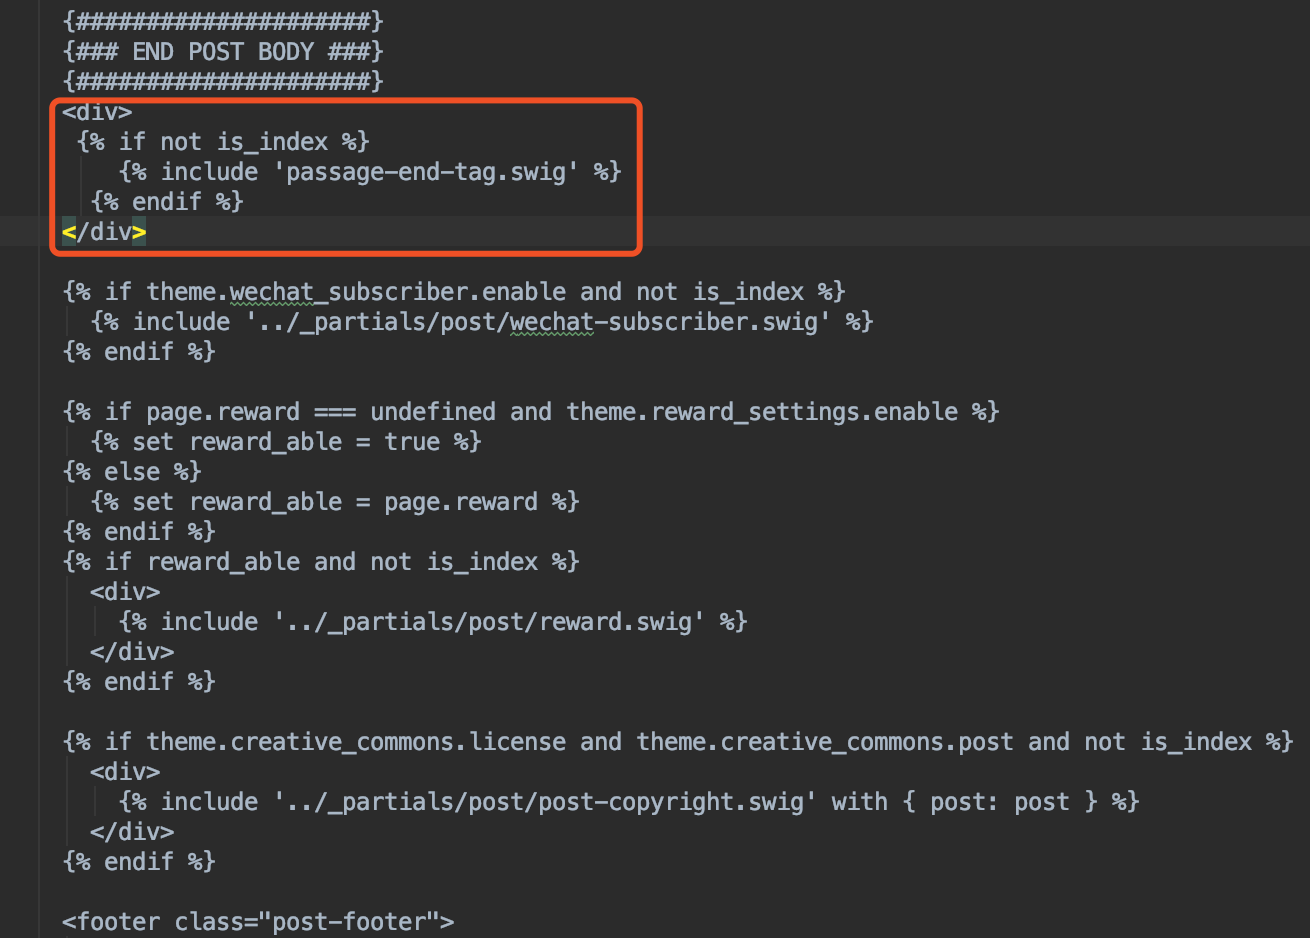
然后编辑themes/next/layout/_macro/post.swig,按照下图添加代码块:1
2
3
4
5<div>
{% if not is_index %}
{% include 'passage-end-tag.swig' %}
{% endif %}
</div>
最后编辑themes/next/_config.yml,添加如下内容:1
2
3# 文章末尾添加“本文结束”标记
passage_end_tag:
enabled: true
添加网页加载进度条
打开themes/next/_config.yml,搜索“pace:”,设置为true。1
pace: true
设置文章的显示顺序
编辑node_modules/hexo-generator-index/lib/generator.js,在return之前添加如下代码:1
2
3
4
5
6
7
8
9
10
11
12
13posts.data = posts.data.sort(function(a, b) {
if(a.top && b.top) { // 两篇文章top都有定义
if(a.top == b.top) return b.date - a.date; // 若top值一样则按照文章日期降序排
else return b.top - a.top; // 否则按照top值降序排
}
else if(a.top && !b.top) { // 以下是只有一篇文章top有定义,那么将有top的排在前面(这里用异或操作居然不行233)
return -1;
}
else if(!a.top && b.top) {
return 1;
}
else return b.date - a.date; // 都没定义按照文章日期降序排
})
然后在每篇文章的头部添加top字段,top值越大的文章显示越靠前。1
2
3
4
5
6
7
8---
title: Hexo+Github博客最简教程-Dockerfile自动搭建
date: 2019-04-18 15:23:05
top: 6
tags: [Hexo, Dockerfile, Linux, Github]
categories: [IDE]
copyright: ture
---
添加底部的小图标
打开themes/next/layout/_partials/footer.swig搜索with-love,修改为如下代码。从fontawesom选择你喜欢的图标名称,我这里选择的是heart。1
2
3<span class="with-love" id="animate">
<i class="fa fa-heart" aria-hidden = "true"></i>
</span>
文章底部添加版权信息
在themes/next/layout/_macro/下新建 my-copyright.swig,填入如下内容:1
2
3
4
5
6
7
8
9
10
11
12
13
14
15
16
17
18
19
20
21
22
23
24
25
26
27
28
29
30{% if page.copyright %}
<div class="my_post_copyright">
<script src="//cdn.bootcss.com/clipboard.js/1.5.10/clipboard.min.js"></script>
<!-- JS库 sweetalert 可修改路径 -->
<script src="https://cdn.bootcss.com/jquery/2.0.0/jquery.min.js"></script>
<script src="https://unpkg.com/sweetalert/dist/sweetalert.min.js"></script>
<p><span>本文标题:</span><a href="{{ url_for(page.path) }}">{{ page.title }}</a></p>
<p><span>文章作者:</span><a href="/" title="访问 {{ theme.author }} 的个人博客">{{ theme.author }}</a></p>
<p><span>发布时间:</span>{{ page.date.format("YYYY年MM月DD日 - HH:MM") }}</p>
<p><span>最后更新:</span>{{ page.updated.format("YYYY年MM月DD日 - HH:MM") }}</p>
<p><span>原始链接:</span><a href="{{ url_for(page.path) }}" title="{{ page.title }}">{{ page.permalink }}</a>
<span class="copy-path" title="点击复制文章链接"><i class="fa fa-clipboard" data-clipboard-text="{{ page.permalink }}" aria-label="复制成功!"></i></span>
</p>
<p><span>许可协议:</span><i class="fa fa-creative-commons"></i> <a rel="license" href="https://creativecommons.org/licenses/by-nc-nd/4.0/" target="_blank" title="Attribution-NonCommercial-NoDerivatives 4.0 International (CC BY-NC-ND 4.0)">署名-非商业性使用-禁止演绎 4.0 国际</a> 转载请保留原文链接及作者。</p>
</div>
<script>
var clipboard = new Clipboard('.fa-clipboard');
$(".fa-clipboard").click(function(){
clipboard.on('success', function(){
swal({
title: "",
text: '复制成功',
icon: "success",
showConfirmButton: true
});
});
});
</script>
{% endif %}
然后在themes/next/source/css/_common/components/post/下新建my-post-copyright.styl,填入如下内容:1
2
3
4
5
6
7
8
9
10
11
12
13
14
15
16
17
18
19
20
21
22
23
24
25
26
27
28
29
30
31
32
33
34
35
36
37
38
39
40
41
42
43
44
45.my_post_copyright {
width: 85%;
max-width: 45em;
margin: 2.8em auto 0;
padding: 0.5em 1.0em;
border: 1px solid #d3d3d3;
font-size: 0.93rem;
line-height: 1.6em;
word-break: break-all;
background: rgba(255,255,255,0.4);
}
.my_post_copyright p{margin:0;}
.my_post_copyright span {
display: inline-block;
width: 5.2em;
color: #b5b5b5;
font-weight: bold;
}
.my_post_copyright .raw {
margin-left: 1em;
width: 5em;
}
.my_post_copyright a {
color: #808080;
border-bottom:0;
}
.my_post_copyright a:hover {
color: #a3d2a3;
text-decoration: underline;
}
.my_post_copyright:hover .fa-clipboard {
color: #000;
}
.my_post_copyright .post-url:hover {
font-weight: normal;
}
.my_post_copyright .copy-path {
margin-left: 1em;
width: 1em;
+mobile(){display:none;}
}
.my_post_copyright .copy-path:hover {
color: #808080;
cursor: pointer;
}
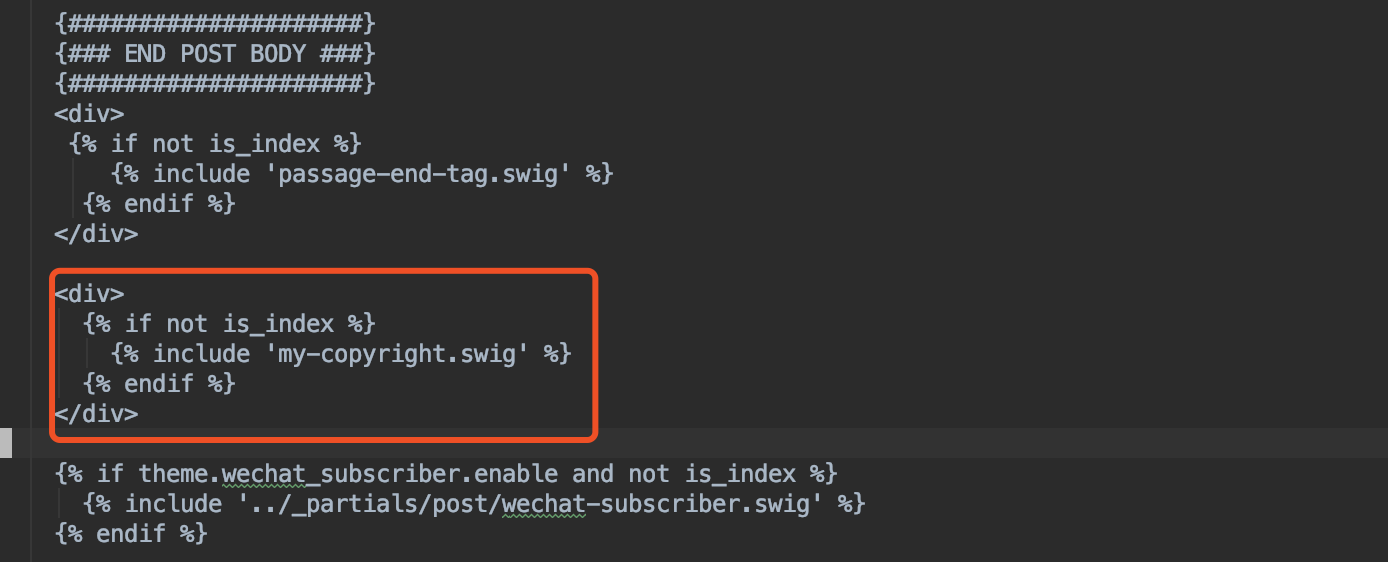
接着编辑themes/next/layout/_macro/post.swig文件,按照下图位置添加如下代码:1
2
3
4
5<div>
{% if not is_index %}
{% include 'my-copyright.swig' %}
{% endif %}
</div>
接着在themes/next/source/css/_common/components/post/post.styl文件最后添加如下代码:1
@import "my-post-copyright"
然后,还需要在文章的头部添加copyright字段:1
2
3
4
5
6
7
8---
title: Hexo+Github博客最简教程-Dockerfile自动搭建
date: 2019-04-18 15:23:05
top: 6
tags: [Hexo, Dockerfile, Linux, Github]
categories: [IDE]
copyright: ture
---
最后,编辑根目录下的_config.yml文件,把url换成你的主页:1
2
3
4
5
6# URL
## If your site is put in a subdirectory
url: https://icoty.github.io # 这里换成你的主页
root: /
permalink: :year/:month/:day/:title/
permalink_defaults:
添加网易云音乐外链
登陆网易云音乐网页版;点击个人头像“我的主页”;然后能够看到“我创建的歌单”,如果没有则创建一个歌单;选中一个歌单点进去,能够看到“歌曲列表”,点击“歌曲列表”右边的“生成外链播放器”;然后点击右下角的“复制代码”,粘贴到themes/next/layout/_macro/sidebar.swig文件中指定的位置即可,我的是放在侧栏中”友链”下面的。
设置文章缩略显示
编辑themes/next/_config.yml,搜索auto_excerpt,设置为true:1
2
3
4
5
6# Automatically Excerpt (Not recommend).
# 设置文章不显示全部 点进去再显示全部
# Use <!-- more --> in the post to control excerpt accurately.
auto_excerpt:
enable: true
length: 150
自定义代码块样式
打开themes/next/source/css_custom/custom.styl,添加如下内容:1
2
3
4
5
6
7
8
9
10
11
12
13
14
15// Custom styles.
code {
color: #ff7600;
background: #fbf7f8;
margin: 2px;
}
// 大代码块的自定义样式
.highlight, pre {
margin: 5px 0;
padding: 5px;
border-radius: 3px;
}
.highlight, code, pre {
border: 1px solid #d6d6d6;
}
把一篇文章归为多类
如下会把该文章归为Linux/IPC类。1
2
3categories:
- Linux
- IPC
如下会把该文章归为Linux/IPC和TCP两类。1
2
3categories:
- [Linux, ICP]
- TCP